Making art can be such an urgent emotional and spiritual experience that safety can be an afterthought. Plus, art supplies are so much fun that we can forget they may contain ingredients we should use cautiously for the safety of ourselves, those around us, and our environment. Taking a little time to understand and mitigate studio hazards doesn’t have to be scary or present an obstacle to expression. We’ve gathered some basic art studio safety tips and resources so you can create with confidence.
5 Things To Remember When Using Potentially Hazardous Materials
- Read the Labels: Take the time to read the labels and follow the directions. Don’t use a product in a way it wasn’t intended.
- Wear Protective Gear: Use gloves or barrier creams, eye protection, and the correct respiratory protection when appropriate.
- Ventilate: Ensure adequate ventilation.
- Wash Your Hands: Wash your hands thoroughly after handling hazardous materials. You should also avoid eating, drinking, or smoking when using the products and wash your clothing before wearing it again.
- Safe Disposal: When you’re all done, dispose of the waste properly.
Let’s go through these in more detail.
Read the Labels
Always read the label before using a product, follow directions, and do not use the product in a way it wasn’t intended. The product label can tell you what precautions you need to take, if any, and what equipment you might need to use to keep yourself safe. It may also outline safe disposal. Even if you think, “I’m only getting a little paint on my hands or washing a little down the sink,” repeated regular usage builds up and can have negative effects in the long run. Even if all your materials are no hazard or low hazard, it’s still a good idea to limit the amount of exposure in case new risks are discovered in the future.
Products labeled as natural alternatives may be safer but are not necessarily non-toxic. All solvents, even natural or lower toxicity ones, still pose risks when inhaled or splashed on skin. Be careful not to be lulled into treating non-toxic substitutes as if they’re completely harmless. Always err on the side of caution and read their safety labels too.
While potentially toxic materials are likely to be found at some level in all products, the key is to know at what level they become harmful and how can you be safe about using them. The most complete source of information on any product will be its Material Safety Data Sheet (MSDS), also called Safety Data Sheet (SDS). These are available on the manufacturer’s website or from the retailer and outline the ingredients, hazards, handling and storage guidelines, exposure controls and personal protection, disposal considerations, and much more. The Hazard Communication Standard: Safety Data Sheets from OSHA’s website show the thoroughness of the information you can expect from an SDS.
Common Art Supply Safety Labels Explained

Conforms to ASTM D 4236
This means that the label follows the standard practice for the labeling of art materials for chronic health hazards. It helps you make responsible choices about choosing and using art supplies. Required for all art materials sold in the US, the label lists all the potentially hazardous contents and any necessary precautions for use. Even if the product contains no hazardous materials, this label is required to show it has been reviewed.
ACMI Certified Product Seals
ACMI (Art and Creative Materials Institute) AP or CL Seals on creative materials assure that they are safe for consumers when used as directed. Products with an Approved Product (AP) or Cautionary Labeling (CL) seal from ACMI undergo extensive toxicological testing by medical experts before being certified. Toxicologists evaluate art products for both acute hazards like skin rashes or eye irritation and chronic hazards, or reactions that occur over longer periods of time. ACMI means it has been analyzed for safety by a toxicologist. Again, it’s assumed you’re not going to ingest, inhale, or absorb the product in a way that’s not standard for its use. The ACMI offers lots of useful information about their safety labeling.
The Approved Product (AP) designation means it’s considered generally safe and contains no materials in sufficient quantities to be toxic or injurious to humans, doesn’t cause acute or chronic health problems, and is non-toxic when used as intended.
The Cautionary Labeling (CL) designation means there are some precautions that need to be taken, but it’s not a major concern if used correctly. Read the product label carefully before opening and do not allow use by children younger than 7th grade.
California Proposition 65 Warning
You may see this scary label on some art supplies: “This product contains chemicals known to the State of California to cause cancer and birth defects or other reproductive harm.” However, this doesn’t necessarily mean you have to avoid the product. The label is required when even trace levels of harmful chemicals can be found in the product and just means that precautions should be taken to use it safely. Updated annually, the list of chemicals requiring the warning is at 900 as of 2023. These fact sheets explain more about the risks and precautions to be taken with each chemical on the list.
Titanium Dioxide, for example, is a common ingredient in various paint colors, indicated on a label as pigment number PW6. This Prop 65 warning fact sheet on Titanium Dioxide helps you understand its risks and how to safely use it: “The only form of titanium dioxide on the list consists of airborne particles measuring 10 micrometers or less (about one-seventh the thickness of a human hair), which can be inhaled.” Therefore. “When using art materials containing titanium dioxide, avoid actions that can unnecessarily release the materials into the air, especially indoors. For example, if it is necessary to shake out a table covering or garment after using these art materials, do so outdoors.” For instance, if you sand a painting that used this pigment, or use it in an aerosol form such as airbrushing, then it becomes airborne and can enter the body through the lungs and eventually into the bloodstream and organs where it can build up. Use the appropriate respirator to filter it out. If it’s not going to become airborne, you don’t have to be concerned.
Wear Protective Gear

Gloves
Wear disposable gloves and barrier cream when you’re painting, especially if you like to manipulate paint with your fingers. They protect your skin from toxins or solvents that can be absorbed through the skin. Even if you’re a neatnik, it’s nearly impossible not to get paint or ink on your hands while working. A brush handle accidentally rolls into some paint, you accidentally grab the part of the rag with wet paint on it, or you’re using spray varnish and your index finger gets coated while pressing the spray cap. Not all toxic materials can be absorbed through the skin, and some manufacturers, like Gamblin, even take pains to use versions of pigments that are largely insoluble in the human body. However, it’s always a good idea to be safe, not sorry. Absorbed toxins build up in the body over time, so practicing preventative protection every day in the studio is a healthy habit. Wear latex or nitrile gloves or even nitrile-coated gardening gloves. To keep gloves from compromising your dexterity, avoid one-size-fits-all gloves and go for ones with a more tailored fit. Or, use shielding lotion or barrier cream, which are like lotions that create a protective barrier on your skin. After working in your studio and before eating, drinking, or smoking, remove the gloves and wash your hands thoroughly. You’ll find it even easier to get your hands and nails clean if they never get dirty in the first place.
Masks
For any art supply that goes airborne, for example spray paint, airbrush color, spray varnishes, fixatives, dry pigments, and wax fumes from encaustics, you need to take care not to inhale it. Wear a snug-fitting NIOSH-approved respirators disposable dust mask or respirator with the correct canister filters and face coverage. However, masks aren’t a good substitute for adequate ventilation, so make sure you’re ventilating properly in addition to wearing a mask.
It may not seem obvious to think of hazards when using drawing supplies, but drawing with pastels creates fine particles of pigment and binder that, when inhaled, are small enough to get deep into the lungs. The toxicity of each pigment used to make the stick also needs to be considered since pastels are basically just dry pigments. Charcoal drawing can also create small dust particles, especially if charcoal powder is used. Graphite creates less dust because more of it remains on the paper than in the air, but graphite powder should be used only when masked.
It’s important to note that dust masks don’t protect from solvent inhalation. The particles are small enough to travel around a dust mask and into your lungs where they can get into the bloodstream. Even some markers, like Chartpak Ad Markers which are Xylene-based, can have heavy fumes that cause dizziness when inhaled.
Aprons
Aprons not only keep your clothes clean and free of paint splatters and solvent spills, but they prevent those materials from going through your clothes and onto your skin. Protective clothing and gear can also take the brunt of any sanding, glaze mixing, and other particles that may be flying around your studio, making it less necessary to wash and change your clothes after your studio session. Just leave your apron in your studio when you’re done, so you don’t transport toxins it may harbor into places where you may eat or drink.
Ventilate
Proper ventilation in your studio is all about airflow and where you set up your workspace. You can either dilute the volume of the airborne materials by removing contaminated air and introducing fresh air, or use local exhaust like a ventilation hood to capture contaminants at the source. Position any exhaust system in a way that draws air away from your face, not up over your head, which will go past your nose and defeat the purpose.
When diluting, the bigger the room, the more air there will be to circulate and dilute fumes, creating lower concentrations in the air you breathe. If you’re painting small in a small room, it’s best to ventilate, but if you’re painting small in a big room, there could be enough circulating air to reduce fume concentrations. With materials of lower toxicity, open windows installed with fans that suck air outwards can be sufficient. Position one fan in a window behind you to bring fresh air in, and position the other fan in a window in front of your work area to suck contaminated air out. For higher toxicity materials, you’ll need local exhaust systems to capture the hazardous materials at their source.
The degree of ventilation required depends on the medium being used. Oil painting, encaustic wax painting, spray painting, xylene-based markers, and some printmaking processes are examples of mediums that require ventilation. Professional Artist Magazine offers a great guide to ventilating your studio, which lists the risks and proper mitigation of those risks.
There are some simple ways to reduce fumes in the first place. When using any solvent, keep it in a lidded container so you can close it off when not in use and reduce unnecessary inhalation. Since fumes are released by evaporation from the surface where the solvent meets the air, you can reduce the surface area of the solvent source by using a narrow jar. If you’re not actively using solvent, keep the lid on. The more you reduce evaporation, the fewer fumes you’ll have to contend with. It’s also a good idea to keep even sealed solvents in a metal cabinet that’s closed at all times. You’ll realize how many fumes they discretely off-gas when you open the cabinet and get hit with a wave of odor! The cabinet is also a good idea for fire safety.
Here are some ventilation guidelines with different media:

Oil Painting
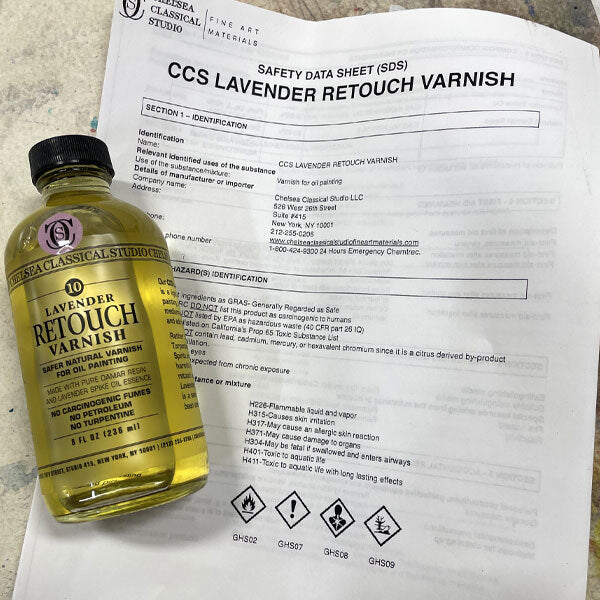
Oil paint itself is not inherently toxic because it consists of pigments bound with natural linseed, safflower, or walnut oil. The solvents used to thin the paint or clean your brushes are what pose the risks. (A few oil paint brands may use solvents within the paint itself, so check the brand website.) Solvents aren’t required for oil painting, but if you use them, choose refined low-odor solvents designed for art instead of the ones from the hardware store. Mineral spirits for artists are distilled to remove more volatile hydrocarbons, giving you Odorless Mineral spirits (OMS). When OMS is distilled still further, you get low-odor solvents like Gamblin’s Gamsol, Weber’s Turpenoid, and Winsor & Newton’s Sansodor. Testing shows that you can tolerate these refined spirits up to three times more than unrefined spirits. Be aware that even these solvents with lowered toxicity or those with no carcinogenic fumes, such as Chelsea’s Lavender Spike Oil Essence, should still be used with adequate ventilation.
You can choose to avoid solvents altogether by using water soluble oil colors and/or solvent-free mediums. Manufacturers are developing safer alternatives to traditional oil painting in response to artists' concerns. Gamblin, for example, offers solvent-free oil mediums made from safflower oil and alkyd resin. They’re non-toxic and contain no Gamsol or petroleum distillates. Our selection of M. Graham fine paints and mediums includes solvent-free non-toxic Walnut Mediums and Walnut Alkyd Mediums. When trying to avoid mediums with solvents, look for ‘petroleum distillates’ in the ingredients list, which are basically mineral spirits. Be aware that some water-soluble oils contain cobalt driers so aren’t completely toxin-free, although the amount used may be negligible. Check the manufacturer’s Safety Data Sheets (SDS) for a complete list of ingredients so you can be aware of what you’re exposing yourself to.
Waterbased media like watercolor, gouache, acrylic, and casein are good alternatives if you want to avoid solvent use. Slow-drying acrylics like OPEN artists acrylic paints and and sets can perform similarly to oils or can be used for underpainting before you apply oils over top. But if you want to use oil paint throughout the painting, you can try water-soluble oils for the thinner underpainting before overpainting with traditional oils, or apply traditional oil straight from the tube scrubbed in very thin layers that will dry fairly quickly instead of using paint thinned with solvent.
Walnut or safflower oil is a great non-toxic alternative for oil paintbrush cleaning while working, followed by soap and water after your painting session. Wipe as much paint off the brush as you can, dab it in the oil and agitate to loosen the paint in the bristles, then wipe again. Or, Weber’s Turpenoid Natural creates a strong solvent action that is non-toxic and nonflammable, and ideal for brush cleaning.
The majority of oil painting varnishes do require the use of solvents and the alternatives are few. You can choose not to varnish at all, or use a thin layer of walnut oil well after the 6 month curing time of the painting is finished. One of the only non-toxic solvents out there is Natural Varnish made by Natural Earth Paints. It’s an alcohol-based varnish that only releases minor fumes during its quick drying time. Due to the alcohol, it is flammable, however.
Another approach is to reduce your use of solvents to the occasional. For example, clean your brushes with walnut oil most of the time, but use a solvent-based brush cleaner like Winsor & Newton’s Brush Cleaner only every month or so for a deeper clean.

Pastel and Charcoal
When working with pastel, charcoal, or graphite, avoid blowing the excess dust away and making it airborne. Instead, lift the paper and tap it to allow the dust to fall onto a damp towel, reducing the amount of powder going into the air. Or, you can set up a portable ventilation system that captures dust right at the easel.
If you choose to use fixatives on your drawings, do so only outdoors or under a ventilation hood to disperse the toxic solvents in the spray. Avoid breathing in the vapors or getting the spray in your eyes. Spectrafix Pastel Spray Fixative, however, is a non-toxic drawing fixative that can be sprayed indoors, even right at your easel! It’s an alcohol-based spray bottle formula with no toxic fumes. Alternatively, you can negate the need for fixative at all by wrapping your drawing in glassine and storing it horizontally in a storage portfolio or flat file where the delicate surface won’t get jostled. Or, frame the artwork soon after completion.
Encaustics or Hot Wax Painting
Because encaustic paint doesn’t require the use of solvents, many safety issues are reduced or eliminated. However, venting the fumes created by heating encaustic paints or mediums is important not only for your health but for fire safety. R&F Handmade Paints, a leading manufacturer of encaustics, offers an excellent guide on why venting your studio for encaustic is so important. They explain, "All waxes, when they are melted release a mixture of invisible fumes in the form of tiny particles and gases, such as acrolien and aldehydes. At the proper working temperature of encaustic (below 220°F), the concentration of these fumes and gases is well below any dangerous level. Still, the emissions may cause irritation if they are not vented. It is important to work in a well-ventilated area at all times, regardless of how long you spend in the studio or how sensitive you are to the emissions initially. Respirators are not a good substitute for ventilation because they are not approved for acrolein, and there is no single cartridge that would filter out all the contaminants."
To remove fumes adequately, work next to a window fitted with an exhaust fan that sucks fumes away from you and out of the room. If it’s too cold to open a window, set up a portable ventilation fan in front of your workspace that can be vented outdoors. Avoid using solvent-based mediums when heating encaustics, as heating solvents can make them even more toxic. If using dry pigments to create your own encaustic paints, use a dust mask to keep from inhaling the pigment. If using oil paint to create your own encaustic paints, make sure they don’t contain solvent, which should never be heated. Cold wax medium for oils is not encaustic and contains a solvent so it should never be heated.
Ceramics
Even if you don’t mix your own glaze from powdered ingredients, masking up in a ceramics studio is essential. Fine particles of silicate dust in unfired dry clay float in the air and can be inhaled deep into your lungs where it can cause respiratory problems. If you’ve ever been in a clay studio, you’ll know they’re naturally dusty places. Regular cleaning of the clay studio with vacuums or wet mops - never brooms - is essential to keep harmful dust levels down. It’s best to wet the dry clay to control the dust before it becomes airborne, so use a wet sponge to clean your tools, wheels, and other surfaces. Similarly, unfired glaze is fragile and easily scratches or rubs off and becomes airborne. The dry materials used to create beautiful glaze colors should not be inhaled. Practice safe storage as well by keeping powdered glaze in airtight containers and wiping up spills of liquid glaze.
Spray Paint, Airbrush, and Spray Varnish
Spray Paint and Airbrush Paint is, clearly, paint in aerosol form, which makes it very easy to enter your lungs and eyes. Spray Paint contains solvent mixed with pigment, making it even more important to mask up and work in a properly ventilated area. Airbrush paint, even if water-based, needs to stay out of your lungs also because it’s mixed with additives that are not safe to breathe into your body. Spray varnishes and spray fixatives for finished paintings and drawings also require the same considerations because of the airborne solvents they contain.
The easiest way to ventilate is to paint outdoors in a gentle wind that blows the spray away from your face. If you’re painting on existing fixed structures, of course, you won’t have a choice in positioning. In that case, wear a respirator that filters out the spray and protective goggles or a face shield if the spray is blowing toward your face.
If you can’t work outside, even a garage with the garage door open is adequate. Use a fan to blow the spray away from you, but be aware that spray paints use flammable solvents that can ignite if the fan or other electrical item sparks so use explosion-proof fans and lights. This is another reason you don’t want fumes to build up inside your workspace! You’ll also need additional fans to suck the toxic air out of the room. The fans should be large enough to move the air sufficiently. Portable ventilators are available from hardware stores and are a great solution for working in a garage space or large studio.
The ideal way to safely use spray paint and airbrush paint is to use a spray booth or ventilation hood. These are designed to capture the paint particulate at the source and exhaust the fumes away from you and out of the space. A similar alternative is a downdraft table that sucks air down through holes in the surface and gets rid of the fumes before they get into the air. If you don’t want to invest in a professional hood or table, there are many DIY spray booth and downdraft table tutorials available online.
Remember, if you can smell the paint through your mask or in your workspace, it’s getting into your lungs and you need to take steps to protect yourself more fully.
Wash Your Hands
Most pigments found in art supplies are not dangerous if not ingested or inhaled, but if you eat a sandwich or smoke a cigarette with a paint-dabbed hand, your chances of exposing yourself to hazardous materials increases. Washing your hands removes hazardous contaminants that you may inadvertently ingest. Better yet, wearing gloves makes it easy to keep your hands clean, down to your pores and fingernails.
Contaminants in the air can land in your open coffee cup and you can drink them down. You may have already experienced a mix-up between your drinking water and your wash water! To be safe, it’s best not to eat, drink, or smoke in the studio. And definitely never use your lips to repoint your paintbrush!

What pigments should you take extra care with?
Whether it’s watercolor, oil, acrylic, pastel, encaustic, etc., the same pigments are used to create the colors - only the binder is different. Artist pigments are mined from the earth, made from rocks that have been ground into fine powders, or created synthetically in a lab. Heavy metals that have been mined, like Cadmium, Cobalt, Lead, Nickel, Chromium, Manganese, and Titanium, make for gorgeous colors with excellent working properties and have been colorants for a long time but must be used with care to avoid health and environmental hazards. The Washington State Health Department has a good safety video on Toxic Substances in Art. However, there are modern alternative pigments that are safer for you, better for the environment, and often more economical. Look for colors with the word “Hue” at the end of the name, such as Cobalt Blue Hue or Manganese Blue Hue. A “hue” can indicate an alternative recipe for a paint without a toxic pigment, a more lightfast version of a color, or a cheaper version of a typically expensive pigment.
A common pigment artist seeks alternatives to cadmiums. Most paint brands offer a “hue’’ version of cadmiums which closely resemble the appearance and performance of true cadmiums. Some manufacturers, like Liquitex and Winsor & Newton, offer Cadmium-Free versions of Cadmium Yellows, Reds, Oranges, and Greens. These colors are designed to act like traditional cadmiums without the toxins or cost. They will not have the same type of pigments so will mix slightly differently from what you’re used to, but they’re a good alternative that you will adapt to in no time. While encaustic paint manufacturers sell cadmium paints, it’s not recommended to heat cadmium because you increase the toxic fumes and inhalation risk. If you do use them, make sure to use proper ventilation and respirators.
There are also completely different pigment alternatives you can try. For example, use Hansa Yellows instead of Cadmium Yellows. Be aware that any time you substitute different pigments in the paint recipe, the mixing properties with other colors will change. For example, cadmiums are opaque mineral colors that offer more natural, muted mixtures and lower tinting strength compared to Hansas, which are transparent modern synthetic colors that mix brightly and cleanly. You’ll want to test mixtures to get used to the different pigment mixing properties and adjust to get the colors you’re used to, but it can be done!
These toxic ingredients in pigments require caution in both use and disposal:
- Antimony: Naples Yellow, Antimony White, Pigment Numbers PW11, PY41.
- Arsenic: Cobalt Violet, Emerald Green, Veronese Green, Pigment Numbers PG21, PG22, PY39.
- Cadmium: Cadmium Reds, Cadmium Oranges, Cadmium Yellows, Cadmium Greens, Pigment Numbers PG14 PR108, PR113, PR20, PR23, PY37.
- Chromium: Barium Chromate, Lead Chromate, Strontium Chromate, Zinc Chromate, Chromic Oxide, Chromium Yellow, Chromium Orange, Pigment Numbers PG15, PY31, PY32, PY33, PY34.
- Cobalt: Cobalt Blue, Cobalt Violet, Aureolin, Cobalt Yellow, Cerulean Blue, may be used as a dryer in inks or oil paints, Pigment Numbers PB28, PB35, PY40, PV14.
- Lead: Flake White Lead White, Naples Yellow, Chrome Yellow, Chrome Orange, Chrome Green, Pigment numbers PW2, PW16, PW30, PR103, PR104, PR105, PO21, PO45, PY34, PY46, PG15.
- Manganese: Manganese Blue, Manganese Violet, Pigment Numbers PB33, PV16, PBk14, may be used as a dryer in inks.
- Mercury: May be used in Vermillion, Cinnabar, and Mercadium colors, Pigment Number PG106.
- Nickel: Nickel Yellow, Nickel Titanate, Nickel Titanium Yellow, Rutile Yellow, Pigment Numbers PY53, PY150, PG10.
(Pigment Numbers are listed on the label, usually on the back.)
The Color of Art Pigment Database offers a well-researched compendium of information on pigments, including notes on their toxicity level.
Safe Disposal
Start by consulting your local landfill or water treatment plant for safe disposal guidelines of hazardous material. Even if you’re using products certified as non-toxic or AP (Approved Product), these only apply to health hazards and not environmental hazards. Just throwing or washing away potentially hazardous materials in the secrecy of your home studio may seem innocuous, but be a responsible artist and have a proper disposal plan in place. It doesn’t take much preparation to make it part of your studio routine.
It’s always best to dispose of art materials as a solid instead of washing them down the drain. Drying locks pigments in place so they can’t move from the landfill into groundwater. Before washing your brushes or work surfaces, wipe off as much wet paint as you can onto rags or paper towels. Let them dry, then throw them away in your regular trash if they contain no toxic pigments or in accordance with local law if they do. This applies to empty jars, tubes, and paper palettes as well. When using paint with toxic pigments, such as cadmium or cobalt, let the paint dry, then scrape your palette and put the scrapings in a designated lidded jar or metal container. If you use a disposable paper palette, crumple up the used sheet and stuff it in the container. Once the container is full, dispose of it in accordance with local guidelines. Wide-mouthed pasta sauce jars or old paint cans are ideal for this purpose.

For oil painting, you can reuse solvents over and over for multiple painting sessions by letting the pigment sludge in your solvent jar settle to the bottom. Then, carefully pour the relatively clean solvent off the top and into a new sediment-free jar. Then, dispose of the sludge-filled jar in accordance with local guidelines. Or, re-use the sludge to tone a new canvas because it’s essentially just pigment and medium plus solvent. Never dump solvents down the drain or toilet because they will go into local water sources and waterways.

The same process can be used with water media like watersoluble oil, acrylic, watercolor, gouache, and ink. Leave the wash water undisturbed until most of the solids settle to the bottom. Then carefully pour the cleaner water into a new container and use for cleaning brushes. Wipe the remaining solids out and let the paper towel dry before disposing of it. Or, let the wash water mostly evaporate before wiping out the solids and disposing of the towel once it’s dry. In the case of acrylics, you should be able to peel the film of dried solids right out of the container.
Careful disposal of rags or paper towels soaked with oils or solvents is necessary because they could start a fire. Paint rags that have wet oil paint on them generate heat as they dry (or more accurately, cure through oxidation) and can spontaneously combust. Let the rags dry first by hanging them outside in a safe area and away from each other. Avoid piling them up - spread them out. Keep a metal trash can with a tight-fitting lid in your studio for collecting the dry soiled rags, and then dispose of them on hazardous waste collection day in your area.
Acrylics have been seen as a low-risk medium because they’re waterbased, but they do contain fungicides or biocides as a preservative to prevent microbial growth that can both ruin the paint and cause illness for some people due to allergens, although it’s rare. The pigments in acrylics are also the same ones used in other paint media, so cadmium, for instance, will have the same level of toxicity in acrylics as in oils or watercolor. Acrylics are actually made of plastic. When diluted in water, very small particles of plastic, or microplastics, can be released into the waterways. Golden Paints created an easy-to-use Crash Paint Solids Wastewater Cleaning System to make your acrylic wash water safe for disposal. This isn’t required if you try the evaporation method outlined above. Alternatively, you can filter out some of the plastics and pigment by pouring wash water through a coffee filter, letting the dirty filter dry, and then disposing of it in the trash or hazardous waste if it contains heavy metals. You can set up a wash water collection bucket in your studio to collect over time and filter it out just a few times a year.
The takeaway here is not to be scared of using art supplies, just be smart about it and use basic common sense precautions. With minimal effort, you can work safely while protecting yourself and your environment so you can make art for many years to come. So don’t feel overwhelmed; just use good products from reputable suppliers who will label them accurately, and then read those labels and MSDS sheets on the manufacturer’s website or call the brand’s product support to ask questions.
You don’t have to have an all-or-nothing approach or go non-toxic all at once. You can make a few changes here and there to reduce reliance on the more toxic materials, perhaps with the goal of eventually eliminating as many as you can. Once you know the risks and how to mitigate them, safety practices can become just another part of your standard art routine. Being cautious and taking preventative measures is the best way to stay safe in the studio for the long term.
DISCLAIMER
Carefully review the manufacturer’s operational and safety procedures for all equipment and art materials. Cheap Joe’s expressly disclaims any liability resulting from reliance upon the views or opinions expressed in this blog article and makes no representations, warranties, or claims of any kind concerning the accuracy or completeness of the information presented here.

Categories
Categories
Recent Posts
Recent Posts


